
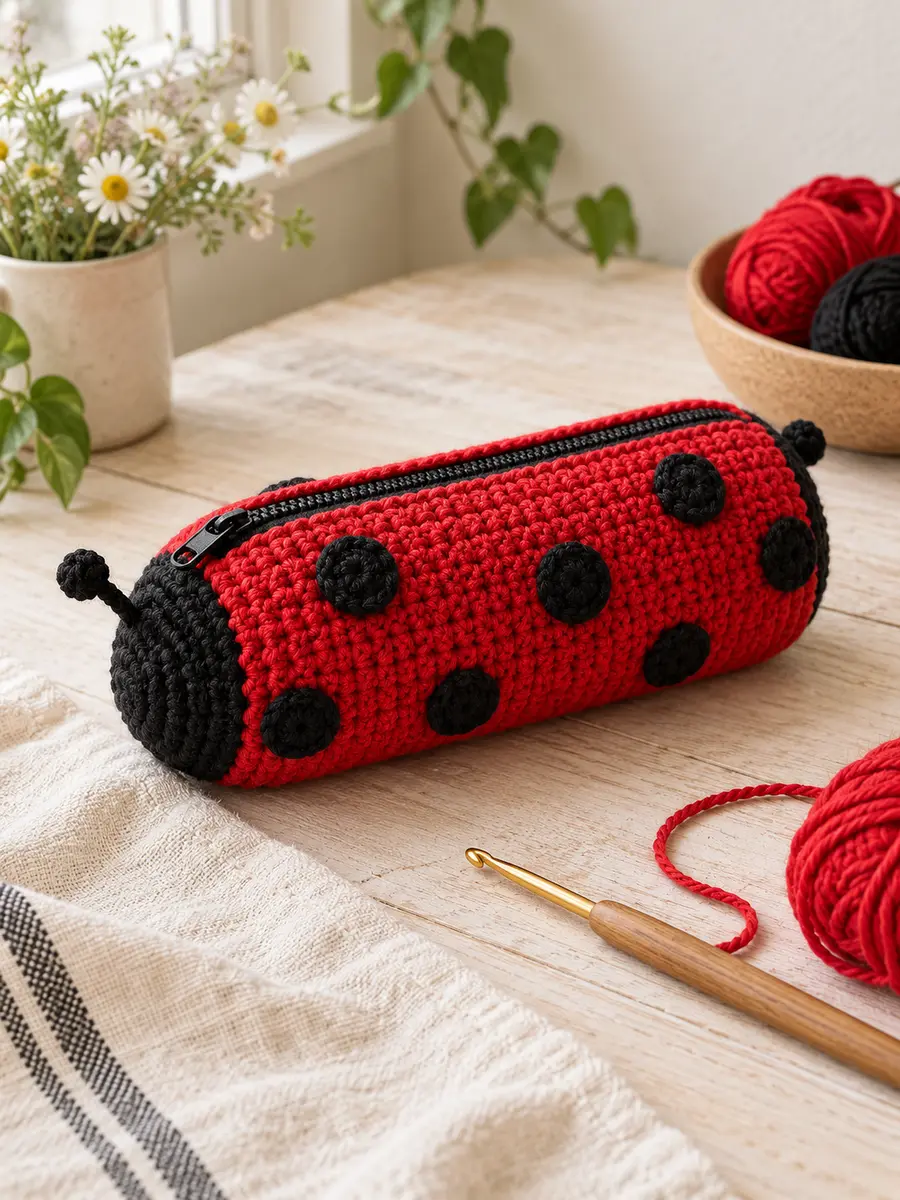
This crochet ladybird pencil case is a cheerful zippered project for pencils, crochet hooks, scissors, and small craft supplies. Two firm oval panels create the body, while simple black appliqués form the head and spots. The pattern uses US crochet terms and is suitable for a confident beginner who can work in joined rounds and sew in a zipper.
Finished size and skill level
- Finished size: approximately 9 inches long × 4½ inches wide
- Skill level: confident beginner
- Construction: two oval panels, appliqué spots, sewn zipper
- US abbreviations: ch, sc, sl st, st(s), inc
Materials
- Worsted-weight cotton yarn: 120 yards red, 55 yards black, small amounts of white
- 4 mm crochet hook
- 10–12 inch non-separating zipper
- Yarn needle, sewing needle, matching thread, scissors, stitch markers
- Optional lightweight cotton lining
Gauge: 17 sc × 18 rounds = 4 inches. The fabric should feel firm so the case holds its shape.
Ladybird body panels — make two
- With red, ch 25.
- Round 1: Work 2 sc in the second ch from the hook, sc in the next 22 ch, 4 sc in the last ch. Working along the opposite side of the foundation chain, sc in the next 22 ch and work 2 sc in the same ch as the first stitches. Join with a sl st — 52 sts.
- Round 2: Ch 1. Work 2 sc in each of the first 2 sts, sc 22, 2 sc in each of the next 4 sts, sc 22, 2 sc in each of the last 2 sts. Join — 60 sts.
- Round 3: Ch 1. (Sc 1, 2 sc in next st) twice, sc 22, (sc 1, 2 sc in next st) four times, sc 22, (sc 1, 2 sc in next st) twice. Join — 68 sts.
- Round 4: Ch 1. (Sc 2, 2 sc in next st) twice, sc 22, (sc 2, 2 sc in next st) four times, sc 22, (sc 2, 2 sc in next st) twice. Join — 76 sts.
- Fasten off and block both ovals to the same size.
Black head appliqués — make two
- With black, make a magic ring and work 6 sc into it without joining. Turn.
- Ch 1, 2 sc in each st across — 12 sts. Turn.
- Ch 1, (sc 1, 2 sc in next st) across — 18 sts.
- Ch 1, (sc 2, 2 sc in next st) across — 24 sts. Fasten off.
- Sew one semicircle to a short end of each red oval. Add two tiny white eye stitches if desired.
Black spots — make six
With black, make a magic ring. Work 6 sc into the ring, join, then work 2 sc in each stitch around for 12 sc. Fasten off with a long sewing tail. Arrange three spots on each panel and sew them down through the back loops for a clean edge.
Install the zipper
- Place the two ovals wrong sides together and mark the upper half of each panel.
- Open the zipper and pin one tape along the upper curve of the first panel. Keep the teeth just outside the crochet edge.
- Using matching sewing thread, backstitch through the zipper tape and a full crochet stitch. Repeat with the second panel.
- Close the zipper before sewing the remaining lower edges together. Test the slider to ensure no yarn catches in the teeth.
Join and finish the case
With black or red yarn, sc the lower halves of the panels together from one zipper end to the other. Keep the right sides facing out for a tidy decorative edge. Add an extra stitch beside both zipper stops, weave in every end, and shape the oval gently with your fingers.
Optional lining
Trace one panel onto folded cotton fabric and add a ½-inch seam allowance. Sew the two fabric ovals together around the lower edge, place the lining inside the case, fold the raw upper edges inward, and hand-sew them to the zipper tape.
Helpful tips
- Count each round so both panels remain identical.
- Use cotton or a cotton blend for a sturdy pencil case.
- If the panels ripple, reduce the increases or use a smaller hook.
- If the zipper is too long, shorten it only after securing a new zipper stop with strong thread.
- For young children, embroider the eyes instead of using buttons or safety eyes.
For more help choosing supplies, read Crochet Hook Sizes Explained and Cotton Yarn for Crochet.