
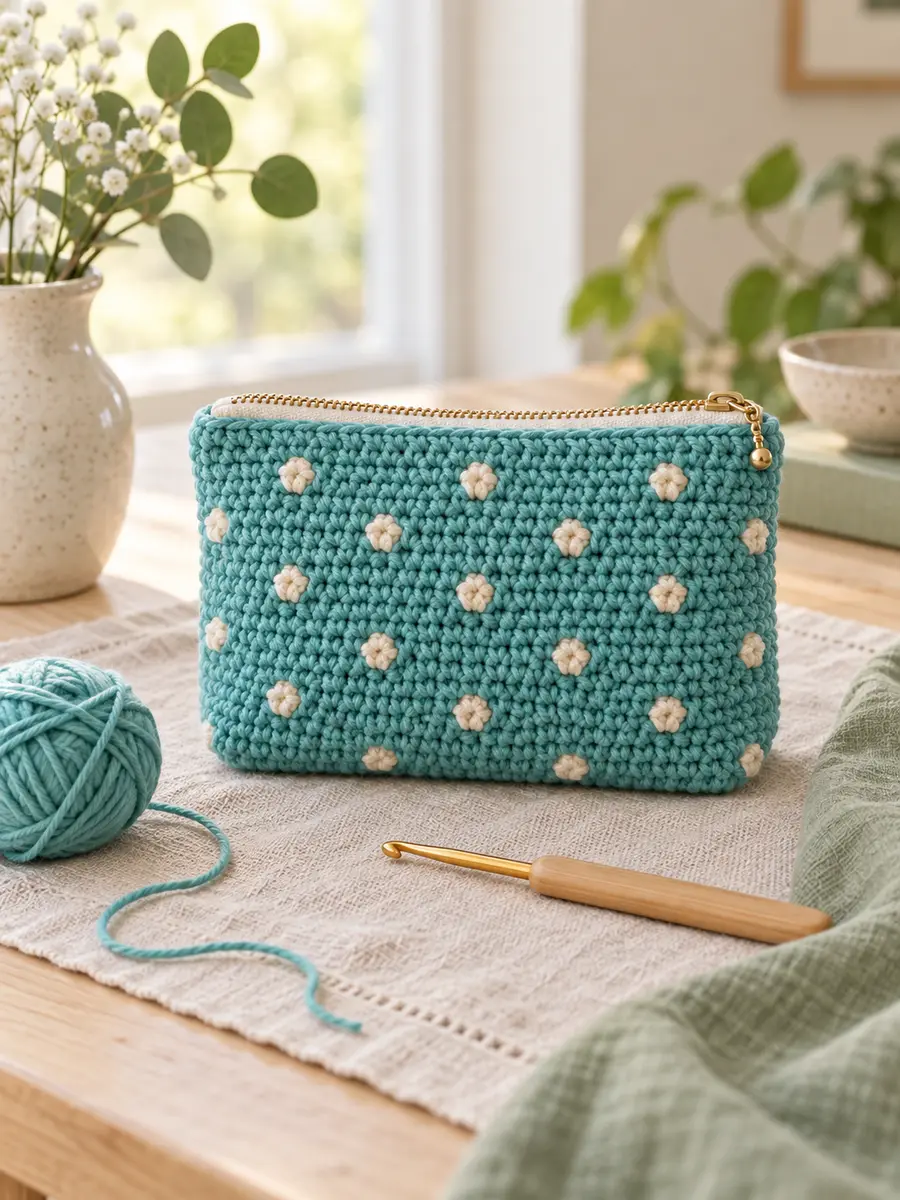
This easy crochet zipper pouch pattern turns cotton yarn and a simple zip into a practical handmade case for hooks, pencils, make-up or small everyday essentials. The dense single-crochet fabric keeps the pouch sturdy, while the cream polka dots add a playful finish without making the construction difficult.
Pattern level: Confident beginner · Terminology: US crochet terms · Construction: One long body panel, two side panels and a hand-sewn zipper.
Finished Size
Approximately 8½ inches (22 cm) wide, 3½ inches (9 cm) high and 3 inches (7.5 cm) deep. You can change the width by adding or removing foundation chains, but check that the finished top edge still fits your zipper.
Materials
- Approximately 120 yards (110 m) of worsted-weight cotton yarn in turquoise
- Approximately 15 yards (14 m) of cream cotton yarn for the dots
- 4 mm (G-6) crochet hook, or the size needed to match gauge
- 9-inch (23 cm) non-separating zipper
- Yarn needle, sewing needle, matching sewing thread, scissors and stitch markers
- Optional: lightweight cotton fabric for lining
Abbreviations
- ch – chain
- sc – single crochet
- st(s) – stitch(es)
- RS / WS – right side / wrong side
Gauge
16 single crochet stitches and 16 rows measure approximately 4 inches (10 cm). Exact gauge is not critical, but your fabric should feel firm rather than loose so small items do not stretch the pouch.
Step 1: Crochet the Main Body Panel
With turquoise yarn, chain 35.
Row 1: Single crochet in the second chain from the hook and in each chain across. You should have 34 stitches.
Rows 2–40: Chain 1 and turn. Single crochet in every stitch across. Chain 1 does not count as a stitch.
Place a marker after Row 14 and another after Row 26. Rows 1–14 form the front, Rows 15–26 form the base, and Rows 27–40 form the back. Fasten off and weave in the ends.
Step 2: Add the Cream Polka Dots
Use cream yarn and a yarn needle to add small duplicate-stitch dots to the front and back sections. For each dot, cover three adjacent stitches on the centre row, then cover one centred stitch on the row above and one on the row below. This creates a tidy five-stitch dot.
Space four dots evenly across the front and four across the back. Keep all yarn tails on the wrong side and secure them firmly without pulling the fabric out of shape.
Step 3: Make the Side Panels
With turquoise yarn, chain 13.
Row 1: Single crochet in the second chain from the hook and across. You should have 12 stitches.
Rows 2–14: Chain 1, turn and single crochet across. Fasten off. Make a second identical side panel.
Step 4: Prepare and Sew the Zipper
- Lightly block the crochet pieces and allow them to dry completely.
- Fold the main panel at the two markers so the front and back top edges meet.
- Centre the closed zipper between the two top edges with the teeth sitting just above the crochet.
- Baste the zipper in place. Open and close it once to check that the crochet does not catch in the teeth.
- Using a sewing needle and matching thread, backstitch through the zipper tape and the top loops of the crochet. Sew the second edge in the same way.
Step 5: Assemble the Pouch
With the right sides facing out, pin one side panel into an open end. Use turquoise yarn and a yarn needle to whipstitch around the front edge, base edge and back edge. Repeat at the other end. Keep the seam tension even and add an extra secure stitch beside each end of the zipper.
Weave in all remaining ends, shape the corners with your fingers and test the zipper. For a polished interior, sew a simple rectangular cotton lining separately and hand-stitch it to the zipper tape without sewing through the outer crochet.
How to Adjust the Size
- Wider pouch: Add foundation chains and use a longer zipper.
- Taller pouch: Add the same number of rows to both the front and back sections.
- Deeper pouch: Add rows to the base section and stitches to the width of both side panels.
Common Mistakes to Avoid
- Count all 34 stitches at the end of every row so the zipper edges stay straight.
- Do not stretch the crochet while pinning the zipper; the two top edges should remain the same length.
- Keep stitches clear of the zipper teeth so the slider moves freely.
- Use cotton or a cotton-rich yarn for a pouch that holds its shape.
Helpful Beginner Guides
If you are still choosing supplies, read How to Choose Yarn for Crochet and Crochet Hook Sizes Explained. For help following abbreviations and row instructions, see How to Read a Crochet Pattern Without Feeling Lost.
Final Notes
This beginner crochet pouch is easy to personalise with stripes, embroidered initials or different dot colours. Save the pattern for your next practical weekend project and make one as a pencil case, crochet-hook pouch or handmade gift.