
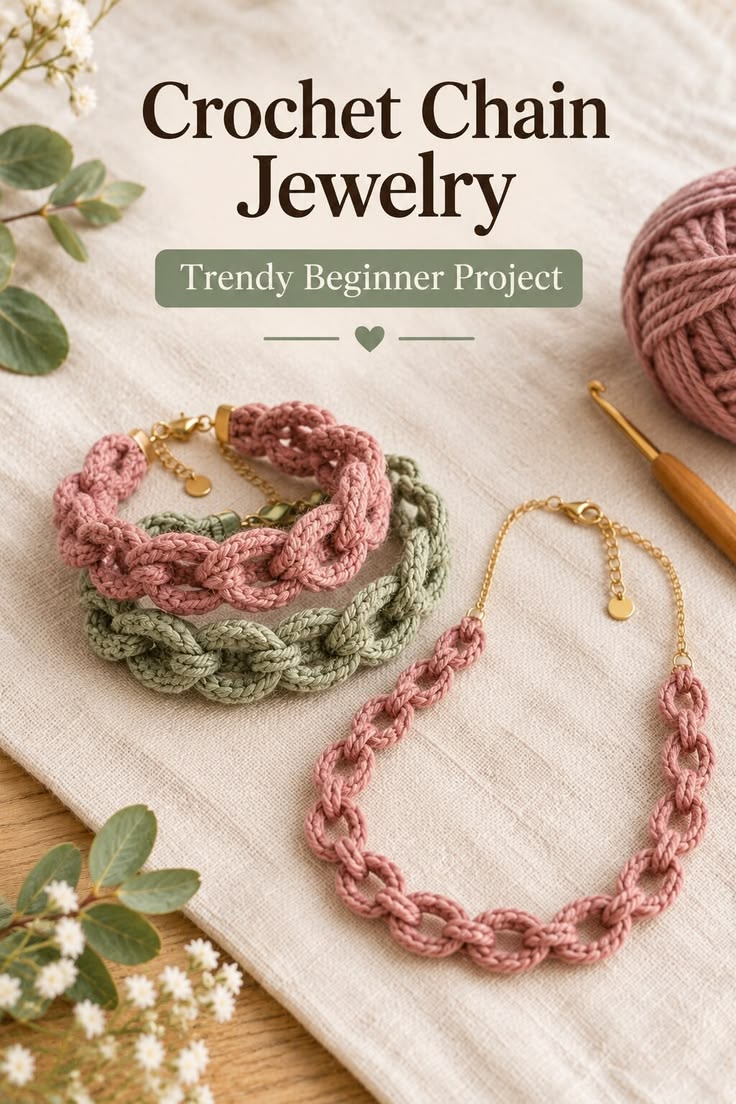
A crochet chain does not have to stay a practice swatch. With the right yarn, a neat tension and a few simple finishing choices, that first stitch can become a lightweight bracelet, a layered necklace or a colorful cord for charms. It is a small project, but it is a good one for learning how much difference tension and yarn choice can make.
Choose yarn that looks intentional
For jewelry, skip very fuzzy yarn. Smooth cotton, mercerized cotton or a soft bamboo blend gives the chain a cleaner outline. Sport or DK weight yarn with a 2.5–3.5 mm hook usually makes a cord that feels light rather than bulky.
- 2 colors of smooth cotton yarn
- 2.5–3.5 mm crochet hook
- Scissors
- Yarn needle
- Optional small beads, charm or jewelry clasp
Idea 1: a simple wrap bracelet
Make a slip knot and chain until the cord wraps around your wrist two or three times without pulling. Keep the stitches relaxed and even. Fasten off, leaving a tail around 15 cm long. Tie the two ends together for the easiest finish, or sew a small loop on one end and use a bead on the other as a button-style closure.
The useful trick is to stop and try it on before cutting the yarn. Crochet chains can stretch a little after wearing, especially in soft fibers, so a slightly snug fit usually works better than an oversized one.
Idea 2: a layered chain necklace
Chain one long strand, then make a second strand a little shorter in another color. Lay them side by side and join the ends with a few small stitches using a yarn needle. Two or three thin chains look more polished than one very thick cord, and the different lengths keep the layers from sitting directly on top of each other.
If you want a softer handmade look, use related shades such as cream, dusty rose and rust. For a brighter Y2K-style accessory, try cobalt with lime, pink with orange, or black with silver-gray.
Idea 3: add beads without making it complicated
Pre-string a few beads onto the yarn before you begin. Crochet four or five chains, slide one bead up close to the hook, then make the next chain with the bead sitting in place. Repeat whenever you want another accent. Spacing the beads out usually looks cleaner than adding one to every stitch.
How to keep the chain looking neat
Do not tighten each new chain around the narrow tip of the hook. Let the loop move onto the wider part of the hook before you pull the next stitch through. That one habit makes the chain more even. If the first ten chains are tight and the last ten are loose, undo them and start again rather than trying to hide the difference at the end.
A small finish makes it look handmade, not unfinished
Weave in the yarn tails carefully and trim them close. If you are making a necklace, check that every knot is secure before wearing it. A charm, a tiny bow or a single contrasting bead is enough decoration; too many extras can make a simple crochet chain look busy.
This is a quick project, but it is also useful practice. Once your chain tension looks consistent in jewelry, starting larger crochet projects becomes much easier. For another beginner-friendly project with a modern look, try the Single Crochet Checkerboard guide.